This post will explain in detail how I was able to set up NSX load balancing in a test environment and was still able to meet the requirements I had for load balancing. The requirements I had for a load balancer for Horizon View were:
- As simple as possible
- Session performance is acceptable and scalable
- Ability to automatically fail nodes so a reconnect gets back in less than one minute
- Balance Horizon View SSL, PCoIP and HTML5 Blast session traffic appropriately
- The entire solution must be able to leverage a single public IP address for all communication
So there are to primary ways of constructing an NSX load balancer, inline or one-armed. These drawings were borrowed from a VMworld 2014 slide deck.


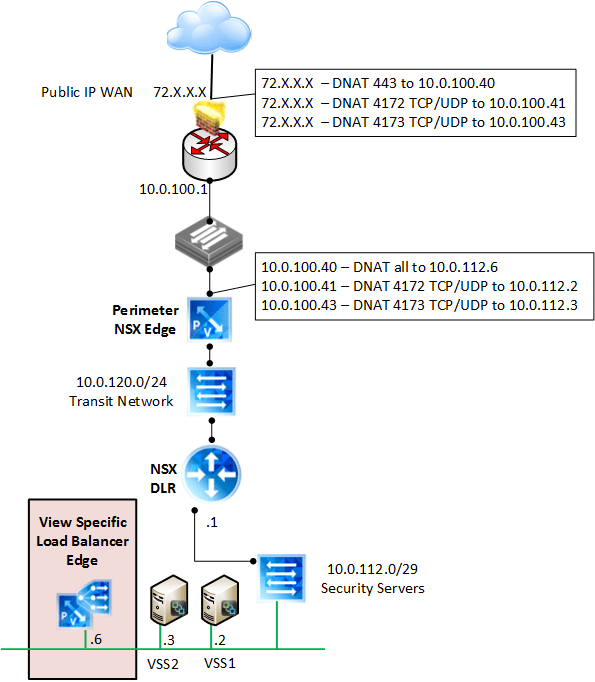
In this particular example, we opted for one armed, which means the load balancer node will live on the same network segment as the security servers.
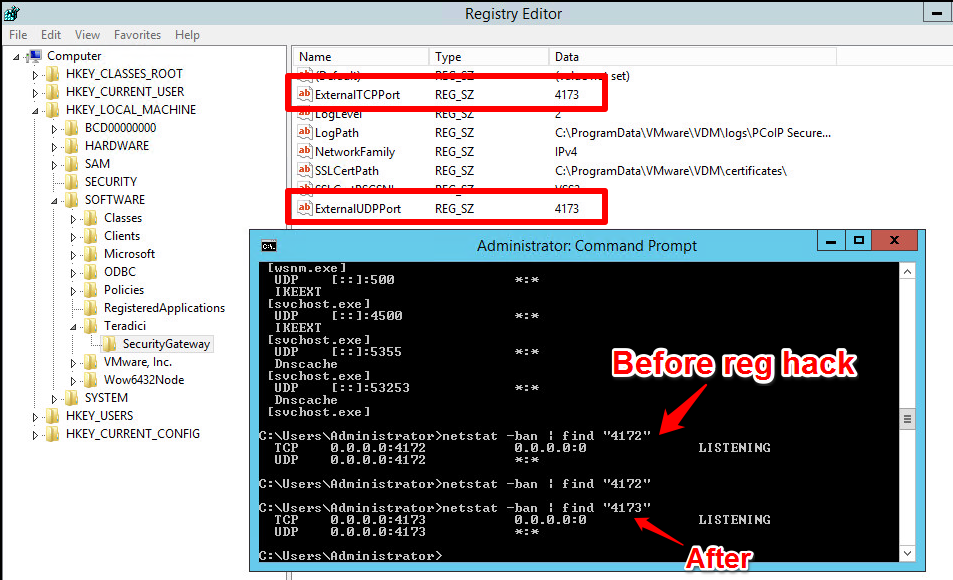
Let’s take a look at logically how this is set up in the test lab. You may notice that I used two ports for PCoIP, 4172 and 4173. This is because I wanted to keep it as simple as possible, and with the requirement of a single IP address, keeping the PCoIP listen port for each security server separate was the easiest option. I was able to load balance and persist both 443 and 8443 with NSX, but stepped around the balancing for PCoIP and simply passed it through. In production you can just use another public IP address if you want to keep PCoIP on 4172, then just NAT it to the corresponding security server. If you need more detail on the lab setup, you can check out my previous post which has more detail on the firewall rules used.
General finding notes about the setup before we get into screen shots:
- The demonstrated configuration is for external connectivity only at present, since persistence matters most when tunneled.
- SSL passthru is utilized rather than offloading.
- The DFW is in play here as well, and all firewall rules are in place according to to required communication.
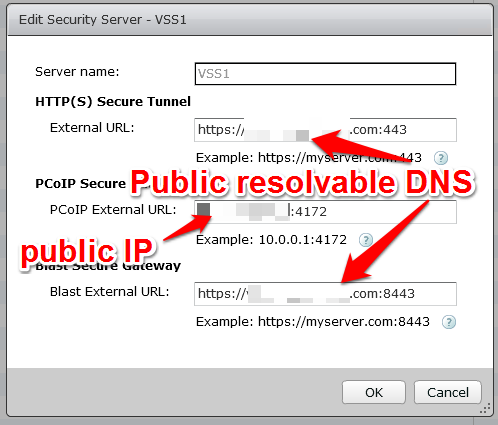
- In order to configure the security server to listen on 4173, I had to follow the KB and create a reghack on the box, AND configure the tunnel properly in the View GUI.
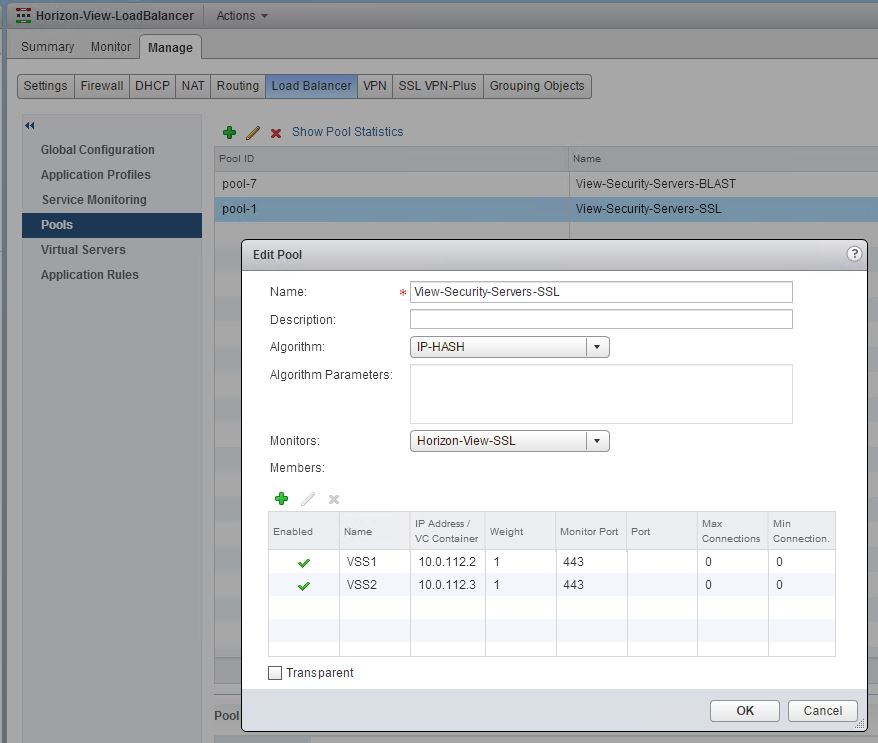
- In order to get SSL and BLAST working together from a single VIP, I ended up needing separate virtual servers, pools and service monitoring profiles that all used the same VIP and Application profile.
- I ended up using ssl_sessionid as the persistence type for both SSL and BLAST, and ended up using IPHASH for the load balancing algorithm.
- I wasn’t able to configure a monitor to correctly say that 8443 was UP, instead it was in WARN(DOWN) on the 8443 monitor. I opted to simply leverage 443 as the monitor for the blast VIP, so there could potentially be a missed failover if only the blast service was down.
Let’s take a look at the configuration screen shots of the View specific load balancer edge that I used.

We opted for the simple configuraiton of SSL passthrough and SSL Session ID was used for persistence.

I found you had to create a separate monitor for each pool for it to function properly, not really sure why.

You should be able to use the /favicon.ico to determine health as we do with other load balancers, but the plain GET HTTPS worked for me and favicon didn’t.


** Important, notice that no ports were specified in the server pool, only the monitor port. That was specified only in the virtual servers below.


Let’s take a look at the screen shots of the View security server configuration.

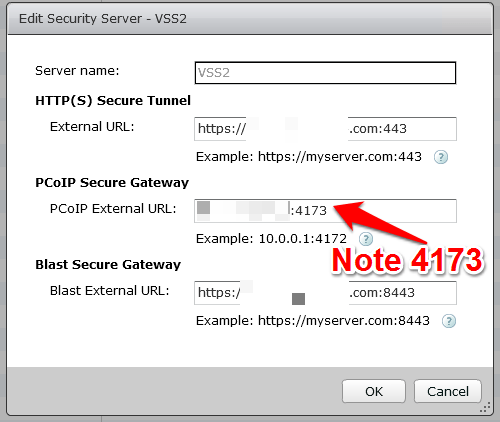
If you have to make a security server listen on another port, don’t forget to change it in the registry as well as in the secure gateway URL field. Also don’t forget to let it through the firewall.

And voila! We have a working configuration. Here’s a quick demonstration of the failover time, which can be completely tuned. Of note, we only tested Blast failover, but SSL and PCoIP work just fine as well. The best part is we were able to create a COMPLETELY separate isolated and firewalled security server without even leveraging a DMZ architecture.
If you’re looking for another AWESOME post on how the NSX load balancer is utilized, I learned more from this one by Roi Ben Haim than from the pubs. Great step by step setup that helped me big time.


