I ran into an issue when deploying vDGA with View 5.3 on Cisco C240 M3s with both K1 and K2 nVidia graphics cards.
First, I’m sure if you’re here, you probably already downloaded and read the whitepaper on how to configure the entire setup.
Virtual Machine Graphics Acceleration Deployment Guide – VMware
If not, go read it.
Here was the setup I was utilizing:
vCenter 5.1 U1 1235232
ESXi 5.1 U1 799733
View 5.3 Build 1427931
View Clients
Windows 7 View Client 2.2.0 Build 1404668
Wyse P25 Tera 2
Cisco C240 M3
nVidia K1 Graphics Card
Teradici 2800 Apex Card
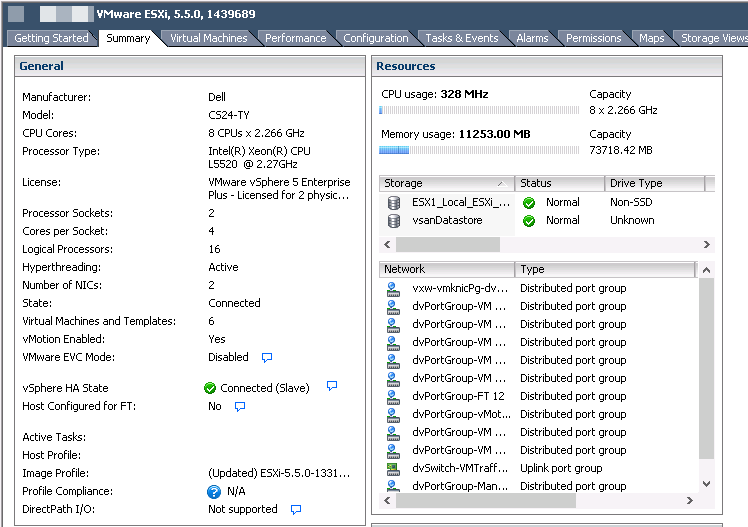
Cisco C240 M3
nVidia K2 Graphics Card
Teradici 2800 Apex Card
The problem I was running into was that most of the documentation was focused on the vSGA configuration, rather than vDGA and it wasn’t perfectly clear what we had tried.
So when I followed the guide to the T with an existing image (and a new bare bones Win7 x64 golden image) would receive a black screen when attempting to log in. Another issue that I had with the documentation was that it was definitely not clear what the View pool settings should be, specifically as it pertains to 3D/hardware acceleration for the vDGA virtual machines.
So in my testing and trials and support with VMware, I finally came across a working solution. Some of these tips and tricks will definitely help you surf the water, I really wish someone had posted this before I had started, it would have made my life a lot easier.
1. Although the deployment guide in its current form says that ESXi 5.1 is supported, for me, it didn’t work with vDGA, we were getting black screens and yellow bangs on the K1 card in device manager on the Win7 VM. My team contacted some of the reps at NVIDIA who cleared up that point for us with the following information: since vDGA was tech preview with 5.1, VMware still supports it. However, for use with production environments you NEED to be at 5.5. No ifs ands or buts. So if you’re not at 5.5? Go ahead and plan that upgrade. Once we upgraded to 5.5 things pretty much fell into place.
2. Firmware firmware firmware. Make sure your hosts are COMPLETELY up to date on their firmware. Let’s be honest, you’re standing up a new environment for best in class graphics performance. Do you really want to start off with outdated firmware?
3. Do you need the xorg service to be running for vDGA to work? No, you don’t. Can you mix and match 2 GPUs on vDGA and 2 on vSGA? Sure you can.
4. When configuring the virtual machine for vDGA, it was really not clear on how to configure the VM and what pool settings to use for graphics acceleration. The pool needs to be set on “Use vSphere Settings” on the pool.
1. Use Virtual Machine hardware version 10. Yes…this does lock you into using the web client to edit the virtual machine settings. Rawr. Also, make sure you set the other advanced parameters that are specified in the vDGA guide that is linked at the top of this article.
2. Use Windows 7 SP1 64 Bit Only
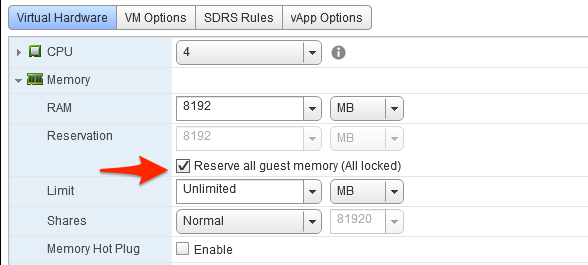
3. Use at least 2 vCPU and 8Gb of RAM
4. Make sure you reserve all the assigned memory to the virtual desktop

6. You must edit these settings using the web client:
Make sure the video card is set to:
1. Software Acceleration
2. 3D Acceleration is UNCHECKED
So once we identified those roadblocks, the configuration now looks like this:
- vCenter 5.5 U1 1235232
- ESXi 5.5 1331820
- View 5.3 Build 1427931
- View Clients
- Windows 7 View Client 2.2.0 Build 1404668
- Wyse P25 Tera 2
Cisco C240 M3
- (1) NVIDIA K1 Graphics Card
- Teradici 2800 Apex Card
Cisco C240 M3
- (1) NVIDIA K2 Graphics Card
- Teradici 2800 Apex Card
And voila! It worked like a champ.
One of the open issues we discovered was that when we followed this procedure to add the cards to the linked clone VMs: We configured base image to have a PCI Device of one of the video cards. Load NVIDIA drivers. Run monteryenable and shutdown. Remove PCI device. Snapshot and deploy. Configure passthru devices for each linked clone VM.
When we did that, we were able to see that the cards remained attached to the VMs. However, the first time we tried to log onto the VM, we’d get disconnected from the session during the first logon. When we reconnected, we found that the logon had worked fine, but for some reason we dropped during the initial connection period. It worked normally for subsequent logins, but every time we refreshed the PC the connection would drop during login. We still have an open case with VMware as to why this is, since the 5.3 release notes say pretty clearly that this is possible.
The moral of the story here is that vDGA rocks, and that we should probably get some more detailed documentation on the setup procedures, particularly around vDGA and linked clones.
Below I’ve got two different videos using a REMOTE connection. When running a simple Geeks3D test using the native graphics and PCoIP, then the second with the K1 utilizing vDGA.
vSGA & PCoIP with 3D Acceleration from Joe Clarke on Vimeo.
vDGA with Nvidia GRID K1 & PCoIP from Joe Clarke on Vimeo.