How to delete the vsanDatastore for VMware Virtual SAN

There are a lot of blog posts on how to set up the cool new Virtual SAN, but not a lot on how to destroy the Virtual SAN object. Probably because it’s really simple. Never fear! In a shameless effort to drive hits from google, here is your step by step on how to delete the vsanDatastore.

Deleting the vsanDatastore means that all the data on the underlying disk groups will be nuked. Gone. Vamoosed. This means you must either migrate the VMs to separate available local storate or to another storage solution. You can delete a disk group from one of the nodes, then reformat the disks into VMFS volumes, but you will obviously lose fault tolerance when you move to that. But hey, you’re the one deleting the virtual SAN object, not me. You should know why you’re doing it and what you’re moving to. I had to do this because I needed to nuke and refresh my cluster on 5.5. U1 from the beta refresh.

1. Migrate all the VMs and templates elsewhere. Where that is, well that is your problem. You can verify if there are any objects remaining by examining the related datastore object here.
Step1
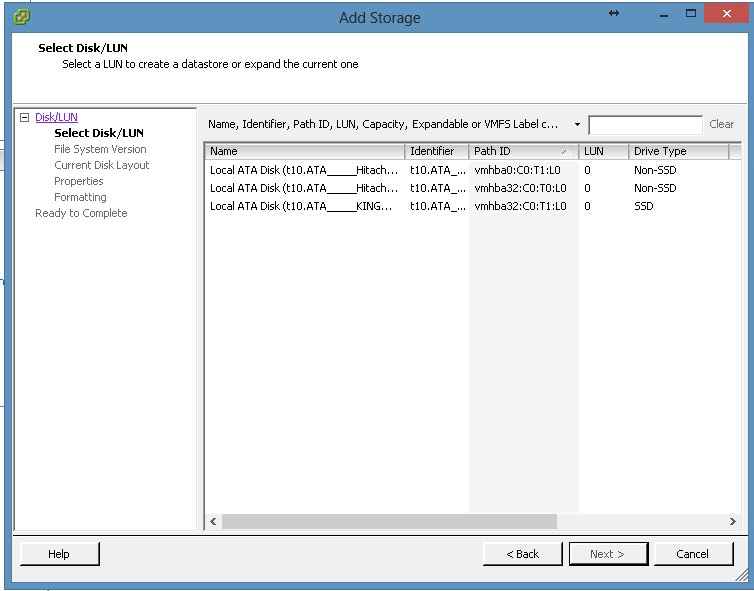
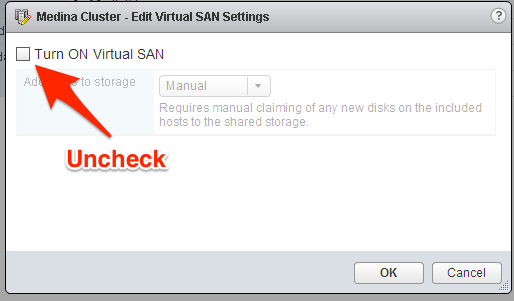
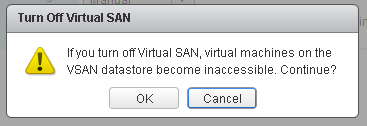
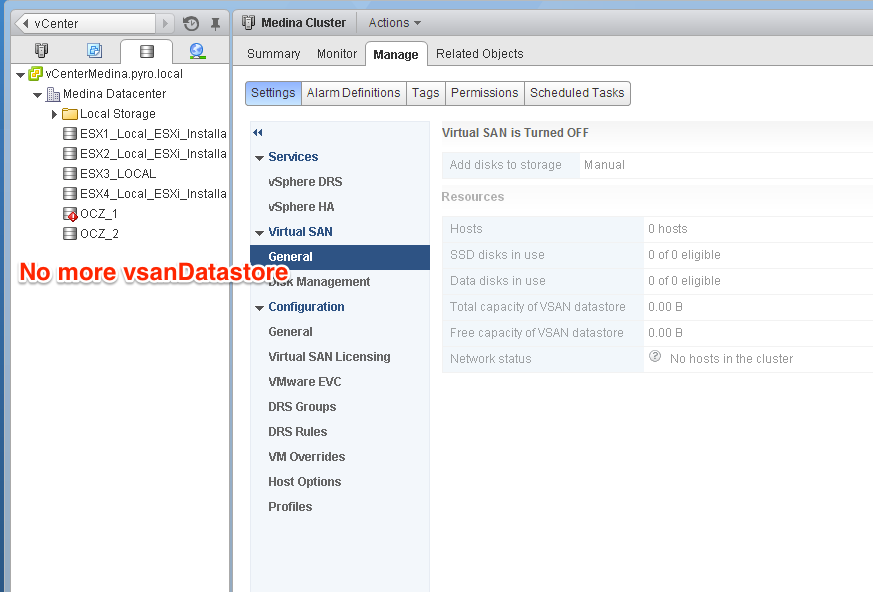
2. Turn off HA on the Virtual SAN enabled cluster. You’ll need this to be off to turn off the Virtual SAN feature.
Step2
3. Delete all the disk groups individually. We will get warned that we should put it in maintenance mode first if we’re performing maintenance, but since we’re nuking the sucker we don’t want to do that.
Step3
3. We can see the local disks become available in the add storage wizard for each host as we delete the disk groups.

step4

4. Repeat the process until all the disk groups have been deleted.
step5
5. We are now ready to turn off the VSAN Feature on the cluster object.

step6

6. Click OK on the warning.

step7

7. Re-enable HA on the cluster. All done!

step8


Wireshark Network Capture Any vSwitch Traffic ESXi 5.5

So before ESXi 5.5 if we wanted to perform a packet capture natively from the ESXi box using standard switches we could only use the tcpdump-uw tool, which only allowed us to capture traffic on individual VMkernel ports. Not very useful if there’s a problem on a standard vSwitch that only has virtual machine traffic on it. With dvSwitch, we can do port mirroring and netflow, but that left the sad little standard switch outside in the bitter cold when it came time to troubleshoot non-vmkernel traffic.

Good news space heroes, released with 5.5 is the newly minted pktcap-uw tool which allows you to specify any uplink for packet capture.

For example, to capture 100 packets on on vmnic1 and output it as a pcap file into /tmp:

pktcap-uw –uplink vmnic1 –outfile /tmp/vmnic1cap.pcap -P -c 100

vmnic1

From here we can use a WinSCP or other file transfer to download the pcap file and load it into Wireshark.

pktcap-uw -h yields the help message with all usage options, including source and destination IP/mac filters.

Packet Capture and Trace command usage:
        == Create session to capture packets ==
         pktcap-uw [–capture <capture point> | [–dir <0/1>] [–stage <0/1>]]
            [–switchport <PortID> | –vmk <vmknic> | –uplink <vmnic> |
               –dvfilter <filter name>]
               –lifID <lif id for vdr>]
            [-f [module name.]<function name>]
            [-AFhP] [-p|–port <Socket PORT>]
            [-c|–count <number>] [-s|–snapLen <length>]
            [-o|–outfile <FILE>] [–console]
            [Flow filter options]
        == Create session to trace packets path ==
         pktcap-uw –trace
            [-AFhP] [-p|–port <Socket PORT>]
            [-c|–count <number>] [-s|–snapLen <length>]
            [-o|–outfile <FILE>] [–console]
            [Flow filter options]
The command options:
        -p, –port <Socket PORT>
                Specify the port number of vsocket server.
        -o, –outfile <FILE>
                Specify the file name to dump the packets. If unset,
                output to console by default
        -P, –ng   (only working with ‘-o’)
                Using the pcapng format to dump into the file.
        –console  (by default if without ‘-o’)
                Output the captured packet info to console.
        -s, –snaplen <length>
                Only capture the first <length> packet buffer.
        -c, –count <NUMBER>
                How many count packets to capture.
        -h
                Print this help.
        -A, –availpoints
                List all capture points supported.
        -F
                List all dynamic capture point functions supported.
        –capture <capture point>
                Specify the capture point. Use ‘-A’ to get the list.
                If not specified, will select the capture point
                by –dir and –stage setting
The switch port options:
(for Port, Uplink and Etherswitch related capture points)
        –switchport <port ID>
                Specify the switch port by ID
        –lifID <lif ID>
                Specify the logical interface id of VDR port
        –vmk <vmk NIC>
                Specify the switch port by vmk NIC
        –uplink <vmnic>
                Specify the switch port by vmnic
The capture point auto selection options without –capture:
        –dir <0|1>  (for –switchport, –vmk, –uplink)
                The direction of flow: 0- Rx (Default), 1- Tx
        –stage <0|1>  (for –switchport, –vmk, –uplink, –dvfilter)
                The stage at which to capture: 0- Pre: before, 1- Post:After
The capture point options
        -f [module name.]<function name>
                The function name. The Default module name is ‘vmkernel’.
                (for ‘Dynamic’, ‘IOChain’ and ‘TcpipDispatch’ capture points)
        –dvfilter <filter name>
                Specify the dvfilter name for DVFilter related points
Flow filter options, it will be applied when set:
        –srcmac <xx:xx:xx:xx:xx>
                The Ethernet source MAC address.
        –dstmac <xx:xx:xx:xx:xx>
                The Ethernet destination MAC address.
        –mac <xx:xx:xx:xx:xx>
                The Ethernet MAC address(src or dst).
        –ethtype 0x<ETHTYPE>
                The Ethernet type. HEX format.
        –vlan <VLANID>
                The Ethernet VLAN ID.
        –srcip <x.x.x.x[/<range>]>
                The source IP address.
        –dstip <x.x.x.x[/<range>]>
                The destination IP address.
        –ip <x.x.x.x>
                The IP address(src or dst).
        –proto 0x<IPPROTYPE>
                The IP protocol.
        –srcport <SRCPORT>
                The TCP source port.
        –dstport <DSTPORT>
                The TCP destination port.
        –tcpport <PORT>
                The TCP port(src or dst).
        –vxlan <vxlan id>
                The vxlan id of flow.

For more information, this KB has information.

http://kb.vmware.com/selfservice/microsites/search.do?language=en_US&cmd=displayKC&externalId=1031186

Quick Reference: Path Selection Policy (PSP) Modification via esxcli

Figured I’d write out some of the PSP modification commands I used today so I’d have them for future reference. You can have them too, there’s probably like 10,000 different posts on this already, but this one is mine so I can find it faster. : D

vSphere 4.0 Command-Line Interface Installation and Reference

Page 85 has information specific to changing the path.

Also: Obtaining LUN pathing information for ESX and ESXi Hosts

Also: Command-Line Management in vSphere 5 for Service Console Users

First and foremost, the vSphere Command-Line Interface reference guide does a way better job than me. This is just what I use on a somewhat normal basis, with the differences between 4.0 4.1 and 5.0 5.1 highlighted.

List all paths on 4.0 or 4.1
esxcli nmp path list
List all path for a specific device on 4.0 or 4.1
esxcli nmp device list –device <device ID AKA naa.60060260d0902d002c7449ced32ceaaa>
List all devices on 4.0 or 4.1
esxcli nmp device list
List all unique device PSPs with counts on 4.0 or 4.1
esxcli nmp device list | grep “Path Selection Policy:” | sort  |uniq –c

image
List all unique working Paths with counts on 4.0 or 4.1
esxcli nmp device list | grep “Working Paths:” |sort |uniq -c
Set pathing policy with 4.0 or 4.1
esxcli nmp device setpolicy –psp VMW_PSP_RR –device <device ID AKA naa.60060160d0902d002c7449ced32ce111>

List all paths on 5.0 or 5.1
esxcli storage nmp path list
List all path for a specific device on 5.0 or 5.1
esxcli storage nmp device list –device <device ID AKA naa.60060260d0902d002c7449ced32ceaaa>
List all devices on 5.0 or 5.1
esxcli storage nmp device list
List all unique device PSPs with counts on 5.0 or 5.1
esxcli storage nmp device list | grep “Path Selection Policy:” | sort |uniq –c
List all unique working Paths with counts on 5.0 or 5.1
esxcli storage nmp device list | grep “Working Paths:” |sort |uniq –c
Set pathing policy with 5.0 or 5.1
esxcli storage nmp device set –psp VMW_PSP_RR –device <device ID AKA naa.60060160d0902d002c7449ced32ce111>

Quickly set pathing policy for all LUNs on 5.0 or 5.1
for i in `ls /vmfs/devices/disks/ | grep naa | grep -v “:”`;
do esxcli storage nmp device set –device $i –psp VMW_PSP_RR; done

Set the default active active Storage Array Type Plugin to Round Robin
esxcli storage nmp satp set -s VMW_SATP_DEFAULT_AA -P VMW_PSP_RR

Screen Shot 2012-11-01 at 1.31.02 PM